 Register My Door
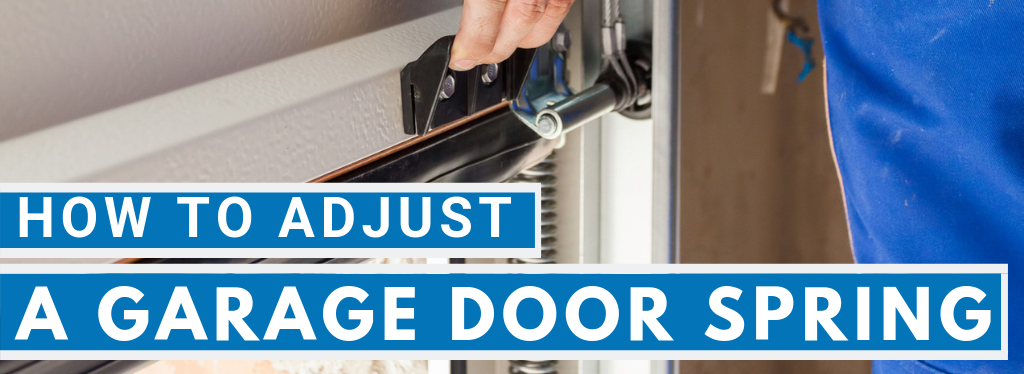
How to Adjust Garage Door Springs Safely (DIY Tips & Guide)
Have you ever been in a hurry and found your garage door stuck because of a broken spring? It’s annoying, but the good news is that problems like this often come from the springs or cables. Skill with garage door spring adjustment gives more control and keeps the door proper.
Your home’s garage door is a set of moving parts working together every single day. Over time, normal use causes wear and tear. Springs and cables are the most affected, and the garage door spring can break for many reasons:
- Aging and repeated use
- Lack of maintenance
- Objects striking the door
- Items jammed in the tracks<
- Aggressive lifting or closing
Call Our Service Team For Help
When these problems appear, your door may refuse to open, lift only halfway, or hang at an angle. In short, the door won’t work until it is repaired or replaced. Before we get into garage door spring adjustment, let’s take a closer look at how these springs function.
How Does A Garage Door Spring Function?
A garage door may look heavy, but the real work of lifting it happens through the springs. These springs carry the weight so the door can move up and down smoothly with little effort.
The main function of garage door springs includes:
- Balancing the weight of the door so it feels lighter.
- Storing energy when the door closes and releasing it when the door opens.
- Preventing sudden falls by controlling the movement of the door.
- Reduce strain on the garage door opener by doing most of the lifting.
- Keeping the door aligned so it doesn’t tilt or hang unevenly.
Without these springs, opening a garage door by hand would be almost impossible because of the weight. Even an automatic opener cannot lift the door safely without spring support. This is why springs are considered the backbone of the entire system.
When a spring is damaged, the door may get stuck halfway, slam shut, or stop moving altogether. That’s when people often start searching for expert garage door spring repair services. Awareness of the garage spring function makes the repair process easier to follow.
If you’ve ever wondered, “How do you adjust the springs on a garage door?” The answer starts with learning how they work. Once you understand their purpose, adjusting garage door springs becomes less confusing.
You can also call experts if you are around Sam Furr Rd, Huntersville, NC. Keep in mind that safety should always be the first priority.
Tools You’ll Need for Safe Garage Door Spring Adjustment
Before you learn how to adjust garage door springs, you’ll need the right tools. The right equipment improves safety and makes the job easier.
Here are some of the main tools you should prepare:
- Winding bars: These are strong metal rods used to safely turn torsion springs. Never use screwdrivers or random rods, as they can slip and cause injury.
- Adjustable wrench: It helps tighten or loosen the nuts and bolts holding the springs and brackets in place.
- Clamps or locking pliers: These are placed on the tracks to stop the garage door from moving while you work. They keep the door secure.
- Socket set: A set of sockets makes it easier to deal with different bolt sizes on the garage door system.
- Tape measure: You’ll need this to measure the spring stretch or gap and check if the adjustment is correct.
- Stepladder: A sturdy ladder gives you safe access to the springs at the top of the door. You should make sure it stands firmly on the ground.
- Safety goggles and gloves: Protective gear is very important. Goggles protect your eyes from dust or snapping parts, while gloves give you a strong grip and shield your hands.
How to Adjust Garage Door Torsion Springs: Step-by-Step Process
Torsion springs handle most of the heavy lifting in your garage door. If they lose balance, your garage door won’t open or close properly. Check out the following section for a clear garage door spring adjustment guide to follow safely.
Step 1: Open Your Garage Door Fully
You should start by lifting the garage door all the way open. It takes most of the weight off the springs and reduces pressure while you work. Use clamps or locking pliers on the tracks to hold the door in place so it does not move.
Step 2: Secure Your Tools
For this job, you’ll need a pair of vice grips, a pair of winding bars, and a 7/16 socket wrench. Each tool has a purpose: vice grips lock the door, winding bars safely turn the spring, and the socket wrench loosens or tightens bolts.
Step 3: Locate the Torsion Springs
You should look above the garage door opening to find the torsion springs. They are mounted on a metal shaft and kept in place with set screws. Before touching them, double-check that your door is secure and will not shift.
Step 4: Loosen the Set Screws
Now, use your socket wrench to gently loosen the screws holding the spring. Do not remove them completely. This step lets the spring move slightly so you can begin the garage door spring adjustment process.
Step 5: Adjust the Spring Tension
Insert one winding bar into the spring’s winding cone. You should turn it carefully in small increments. It increases or decreases tension depending on whether the door needs more lift or less. Always keep a second winding bar in place for safety.
Step 6: Test the Balance
After adjusting the garage door springs, lower the door slowly and see how it moves. A balanced door should stay halfway open without falling shut or sliding up. If it doesn’t, repeat the steps with small adjustments until balance is reached.
How to Adjust Garage Door Side-Mounted (Extension) Springs
Extension springs are mounted on the sides of the garage door and stretch as the door closes. Since garage door springs must be properly balanced, adjusting them the right way is important for safe operation. Check out the following step for proper guidelines.
Step 1: Open and Secure the Door
You should lift the garage door completely so that it is in the open position. Use clamps or locking pliers on the tracks to hold it in place. It reduces pressure on the extension springs and makes it safer to begin adjusting garage door springs.
Step 2: Identify the Extension Springs
You will see a spring on each side of the door connected to cables and pulleys. These springs stretch when the door is closed and contract when the door opens. If the door feels uneven or too heavy, that means the springs are not balanced correctly.
Step 3: Disconnect the Spring Hook
Each extension spring is attached to a track support or hanger with a hook. You should use a socket wrench or pliers to carefully remove the hook. Once removed, you can shift it to a different hole on the support to change the tension. This way, the spring length is adjusted.
Step 4: Change the Spring Tension
To increase lift, you should move the hook to a hole further away from the door opening. To reduce lift, you should place it closer. This step works like a manual version of garage door torsion spring adjustment, but on side springs instead of overhead ones.
Step 5: Test the Balance
After reconnecting the spring, you should lower the door slowly and check how it behaves. Garage door springs must be properly balanced, and the door should stay in place if opened halfway. If it slams shut or rises quickly, you should repeat the process with small changes until balance is achieved.
How to Adjust a Double Spring Garage Door
A double spring garage door uses two torsion springs instead of one. These springs share the weight of the door. Thus, they make it safer and smoother to operate. Proper adjustment of garage door springs on a double setup keeps both springs equal.
Step 1: Keep the Door Open and Secure
You must lift the garage door fully and lock it in place with clamps or vice grips on the tracks. It prevents the door from moving while you work. Securing the door is the first safety step before touching any spring.
Step 2: Locate Both Torsion Springs
On a double spring system, the springs are mounted on the metal shaft above the door. One sits on the left, the other on the right. Each spring works together to balance the door. Uneven tension between them is what causes the door to tilt or stop moving properly.
Step 3: Loosen the Set Screws
Using a socket wrench, gently loosen the set screws on the winding cone of each spring. Do not remove them fully, just loosen enough to grant spring adjustment. It prepares the springs for the garage door spring adjustment process.
Step 4: Adjust Both Springs Evenly
Now, you should insert a winding bar into the first spring’s cone and turn it carefully in small increments. Do the same with the second spring. Always try to match the number of turns on both sides. Keeping the springs equal is important when learning how to adjust a double spring garage door safely.
Step 5: Test the Door Balance
Remove the clamps and lower the door halfway. A properly balanced door should stay in position without rising or falling. If it doesn’t, you should repeat the process with equal adjustments on both springs until a smooth balance is reached.
Why DIY Spring Repair is a No-No
A broken garage door is stressful, and it’s natural to want a quick fix. But when it comes to adjusting or repairing garage door springs, doing it yourself is risky and unsafe. You should try to call experts in garage doors if you live near S Church St, Huntersville, NC.
Here are some common dangers you should know:
- Extreme tension: Springs carry the full weight of the door, often 125 to 225 pounds. One wrong move can cause serious injury.
- Unbalanced springs: If only one spring is replaced or adjusted, the door becomes unstable and may slam shut or rebound.
- Weak garage door opener: The opener is not designed to hold the door’s weight. It only guides movement and fails if springs aren’t balanced.
- Complex calculation: The total weight of the door, hardware, and windows must be measured correctly to match the right springs.
- Security risk: Faulty springs make your garage door unreliable. Also, it can leave your home vulnerable.
Let’s see what some people say about their experience:
“My neighbor fixed his garage door, so I should be able to do it too.”
This thinking is dangerous. Springs are under extreme pressure, and lifting parts connected to them is like lifting the full weight of the door. One slip could cause serious hand, arm, or even face injuries.
“Only one spring is broken, so I’ll just replace that one.”
It may sound smart, but it isn’t safe. Both springs carry the same load and wear out together. If you replace just one, the door becomes unbalanced. If you put extra stress on the opener, it can pose a bigger garage door safety risk.
“My opener will hold the garage door while I fix it.”
This is a common but false belief. Openers aren’t designed to carry that heavy weight. They only guide the door’s movement. Without proper spring support, the opener can break. Also, it can leave the door unsafe and increase the risk of sudden falls.
For Help With Your Garage Door Spring Adjustment, Call RCS Carolina Garage Doors
Making adjustments to your garage door can be hazardous for inexperienced homeowners. So when you need to tighten your garage door springs and cables, trust the highly trained and knowledgeable technicians at RCS Carolina Garage Doors.
We have decades of garage door repair and maintenance experience throughout North and South Carolina and the surrounding areas.
To learn more about our garage door spring adjustment and repair services, call us today at 980-480-9767 or complete our online contact form to request services.